In part 14 of this production basics series, we briefly went over the different types of effects. In the next couple of articles, we will dive deeper into each effect category. Let’s start by looking at one of the most important plugins that exist: the equalizer.
An equalizer is a powerful tool that is often used to balance out the frequency spectrum of an audio signal. A signal that has too much low end and too little high end can be flattened out to a certain extend. So how does an EQ work and how can we use it when mixing?
How does it work?
An equalizer has some options to manipulate the frequency spectrum. It features different kinds of filters such as the low-pass filter, high-pass filter, band-pass filter, and notch filter.
A low-pass filter basically passes all low frequencies and attenuates high frequencies while a high-pass filter is the opposite of a low-pass filter. A band-pass filter is a combination of a low-pass filter and a high-pass filter used for narrowing the frequency spectrum. For more information about filters check out part 10 on subtractive synthesis.
A notch filter is used to completely remove one particular frequency or a small band of frequencies. It’s basically a bandpass filter in reverse.

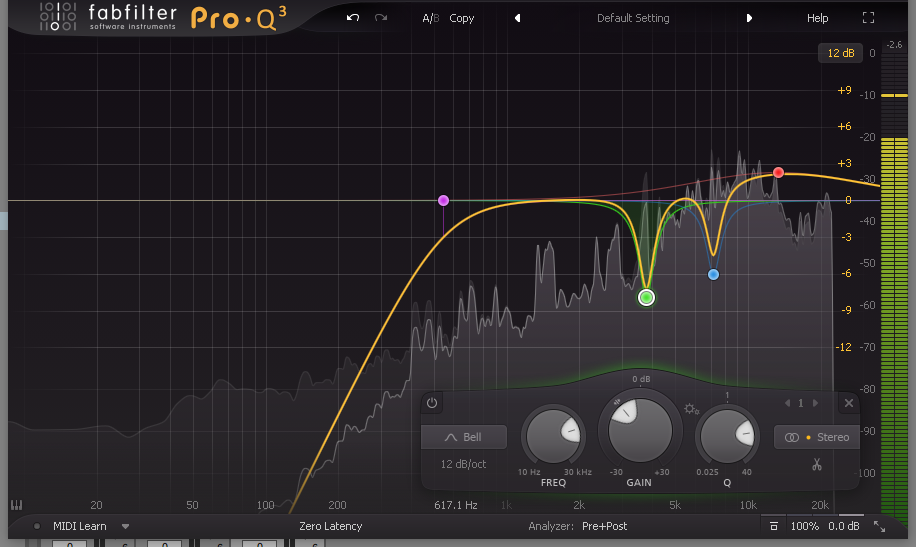
While filters are used to remove frequencies, sometimes you may want to boost or lower some frequencies a little bit. This is the job of the peaking filter or bell filter. A bell filter can be set to a certain frequency, and by using the gain knob you can decide how much you want to boost or how much you want to attenuate that frequency.
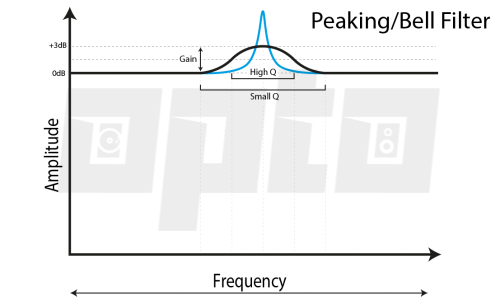
The Q or bandwidth of the bell filter allows you to change the frequency range that is affected by the filter. A small Q has a larger bandwidth while a higher Q has a smaller bandwidth. A Q of 0.7 sounds the most transparent and is used in many analog filter designs.
Sometimes you may want to amplify all high frequencies of a sound. That’s exactly what a shelving filter does. A high-shelf filter boosts or lifts frequencies above the cutoff frequency and stays put at that frequency until the end of the spectrum. The EQ curve looks a bit like a plateau, or shelf, hence the name.

The low-pass filter does the opposite and boosts frequencies lower than the cutoff frequency. Shelving filters also have a Q factor which affects the steepness of the filter curve. Just like low-pass and high-pass filters you can also change the slope of the filter in dB/octave or a number of poles.
So what’s the use of all of this?
Each time we record sounds, use a synthesizer or import some samples, we need to tweak that sound to fit the rest of the elements in our song. Mixing music is all about balancing elements against each other. A mix doesn’t exist in isolation. One sound may sound great on it’s own but may completely disappear in the mix. Because humans have a limited hearing range (20Hz to 20.000Hz) we need to make decisions about which sounds are important and which sounds are less important.
It’s important to note that our ears have a specific hearing curve. The Fletcher-Munson curve describes the way we hear sound. Our ears are the most sensitive in the 3kHz (3000Hz) to 5kHz (5000Hz) range while we are less sensitive to low and high frequencies.
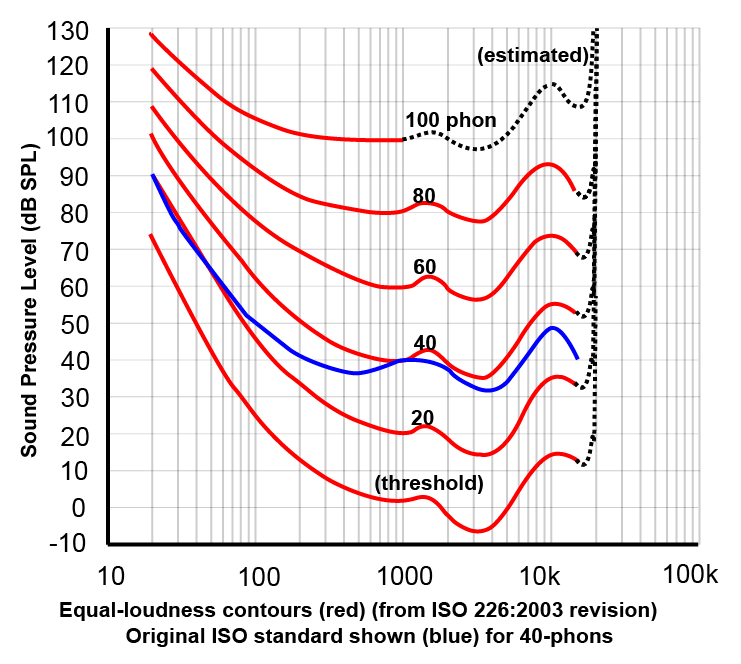
When we listen at higher levels, our hearing curve will flatten out a bit, allowing us to hear a bigger part of the frequency spectrum in a more balanced way. This is why we perceive a louder sound as better. It’s important to listen to your mix at different monitoring levels. If a mix sounds balanced at low levels it usually sounds balanced at louder volumes as well. This is why I often mix at lower volumes and only check it at louder levels from time to time.
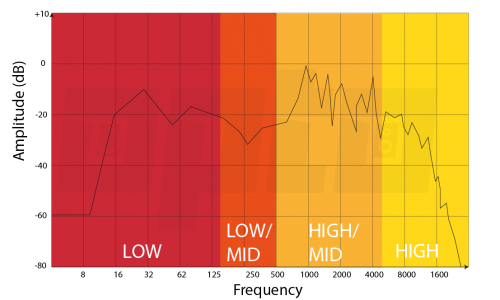
We can divide the frequency spectrum between 20Hz and 20kHz into smaller sections: low-end, low-mid, high-mid, and high end. These are subjective terms as one person might label something as low differently from another person. But in general low-end is usually situated below 150Hz, while low-mid ranges from 150Hz to 500Hz, high-mid has a range between 500Hz and 5000Hz, and high-end is everything above 5000Hz.
More subjective terms are often used by music producers and mix engineers such as ‘air’, ‘boxy’, ‘warm’, ‘harsh’, ‘muddy’, and many more. You will learn what these terms mean over time. Just note that these terms are not set in stone and will change from producer to producer.
Harmonics
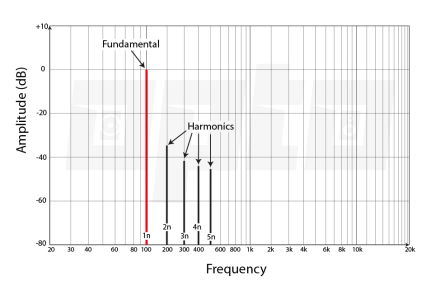
All sounds have a fundamental or dominant frequency. The low E string on a guitar has a frequency of 82Hz, while a kick drum may be peaking at 50Hz. The fundamental is usually the loudest frequency of an instrument, but many instruments are spread out across a range of frequencies.
Multiples of the fundamental frequency are called harmonics. A sound that has a fundamental frequency of 100Hz may have harmonics at 200Hz, 300Hz, 400Hz, and higher.
A lot of instruments also feature inharmonic frequencies that are not in any way related to the fundamental frequency. A cymbal or hi-hat, for example, has a noisy sound signature, there isn’t one definable pitch, it’s made up of lots of different frequencies combined. The same is true for a bow striking a violin which not only vibrates the string but the friction between the bow and strings create a noisy sound signature.
Band limiting
By using EQ we can limit the range of frequencies a sound takes up. A general rule to remember is to apply a high-pass filter on all instruments except for the kick and bass. Low frequencies take up a lot of space so getting rid of the low end on most instruments helps to create a clear and defined mix.
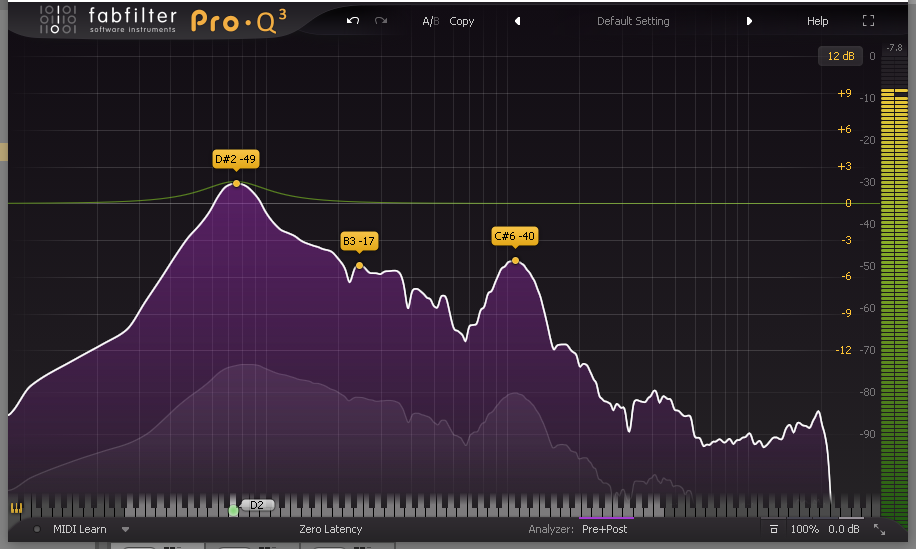
A singer may not even have frequency content below 100Hz, but traffic noise, footsteps, or other sounds might get picked up by the microphone which needs to be removed. It helps to use a spectrum analyzer like the free SPAN Analyzer so you can see the frequency contents of a sound.
Cleaning up the high-end
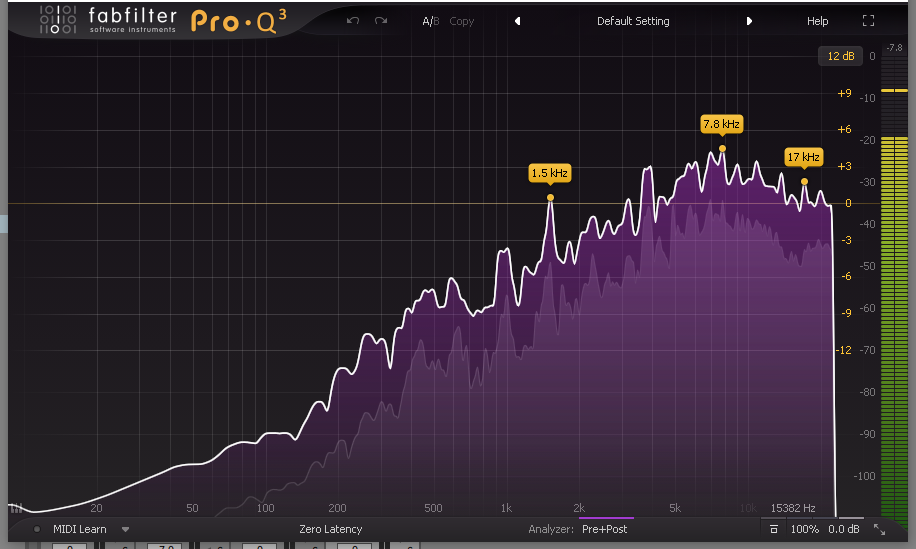
The same is true for the higher end of the spectrum. A bass might produce noise above 2000Hz but do we really need to use it? A trick is to filter out some high end with a low-pass filter while listening to the complete mix. Don’t listen in solo because nobody is ever going to listen in solo when the song is released. Go as low as you can go and stop until you hear a change. This leaves room for the other instruments that are more important in the upper end of the spectrum.
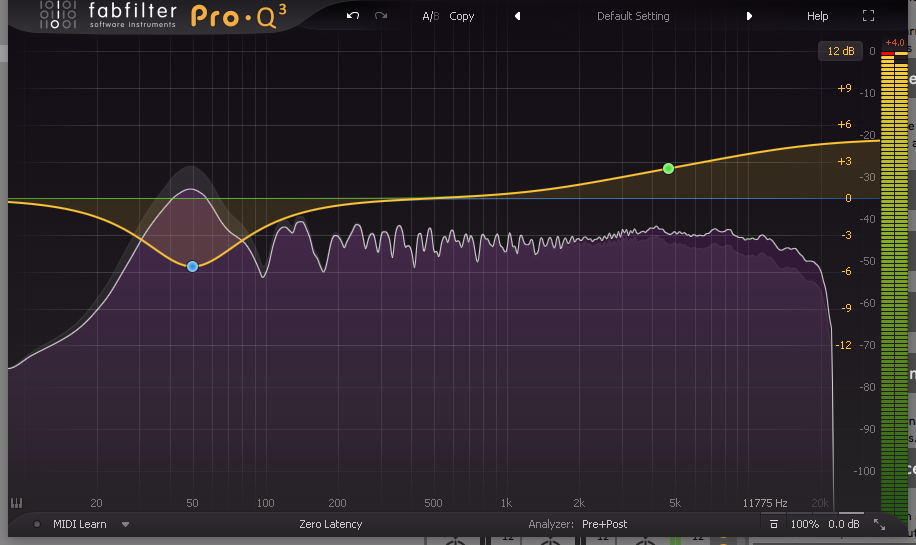
Shelving filters are useful to attenuate part of the spectrum instead of completely removing these frequencies altogether. I often use low-shelves to attenuate some low frequencies below 300Hz on acoustic guitar or piano recordings to make some room for the bass and drums. I often use a high-shelf on drums to boost everything above 10Khz and add some ‘air’ to the mix.
A note about filter slopes
When using low pass filters I often use low slopes like 6dB/octave or 12dB/octave. This sounds the most natural to our ears. When removing low end rumble with a high pass filter I tend to use 18dB/octave or 24dB/octave slopes but not much more than that.
Mixing Kick and Bass
One of the hardest things to get right is the balance between kick and bass. This isn’t always a mixing problem. Often you need to make a choice about using a huge sounding kick or a huge sounding bass. You can’t have both, not at the same time at least.
Choosing the right sounds is important but so is the arrangement. Basslines in trance music are deliberately used everywhere except at the time the kick plays. Trance kicks are usually short, which leaves more space for the bass.
Tune your kick
Before you grab an EQ it’s important to tune your kick to the root, third or fifth of the key so that it works in tandem with the bassline. Use your ears to fine-tune the pitch and you’ll notice a big improvement in the mix.
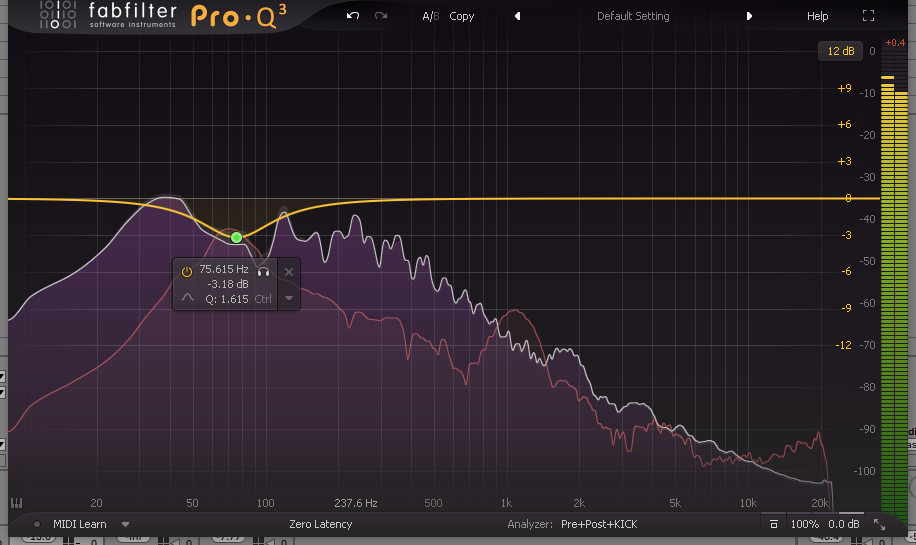
Which is more important kick or bass?
At the mixing phase, you still need to make some important decisions. If the bass and kick are clashing you will need to cut some low end out of one or the other. Let’s say that the bass is peaking at 80Hz while the kick does so as well. Which one is more important for the song? The kick or the bass? If you know that answer you can attenuate those clashing frequencies on the least important element by using a bell filter.
Use this technique with other instruments as well. Try to find a frequency range that is important with each instrument. Ask yourself questions like, what function does this instrument have? What are the main instruments and what instruments are less important? Emphasize the good parts and de-emphasize the bad parts.
Cutting rather than boosting
There are always two ways of solving a problem with EQ. If you have too little high end, you can either try to boost the high end, or you can attenuate the low end. Attenuating is the preferred option because it frees up space.
Boosting takes up space and doesn’t get rid of the problem which is attenuating the abundant low frequencies. Also, it’s not always possible to boost frequencies, you can’t boost frequencies that are not present, while you can always attenuate frequencies that take up too much space.
Cutting frequencies can be done with a smaller bandwidth or higher Q while boosting is usually done with a wider bandwidth or lower Q. Try to remove frequencies first, before you resolve to boost. Often you’ll find that after removing offending frequencies it isn’t even necessary to boost anymore.
Common EQ moves
Here are some common EQ moves I make almost every time:
- Removing ‘boxy’ or ‘muddy’ frequencies on a kick: a bell cut between 200Hz and 400Hz.
- Adding ‘punch’ to a snare drum: slight boost between 100Hz and 200Hz.
- Filtering out the low end on hi-hats and cymbals: high-shelf filter (18dB/octave) with a cutoff frequency of 500Hz and up.
- Removing high end from guitars: 5kHz and up with a low-pass filter (12dB/octave).
- Attenuating mid frequencies from Pads and Atmospheres: bell-cut around 200Hz-600Hz.
Remember to always use your ears and judge for yourself. There are no general rules on EQ’ing your kicks and snares. You will learn what to do with experience.
Listen to your music on different speakers, in the car, on earbuds, on your phone, and compare your mixes to other songs. Just like everything about music production, it takes time, and practice makes perfect.
In the next part, we’ll take a look at compression to control the dynamics of a track.