Serum Basics
Serum is probably the most used software synthesizer as of today. Because of its Wavetable engine, you get almost unlimited sound shaping options. Many preset packs and tutorials are available online, and you can basically route anything to everything.
Serum has 2 oscillators, one sub oscillator, a noise generator, 3 envelopes, 4 LFOs, and 2 chaos oscillators. It has a built-in FX section that sounds great, and various wave-shaping options.
The filter has various options, from the basic low-pass filter to various emulations of vintage synths and complex reverb filters.
Let’s take a closer look at each section and its controls.
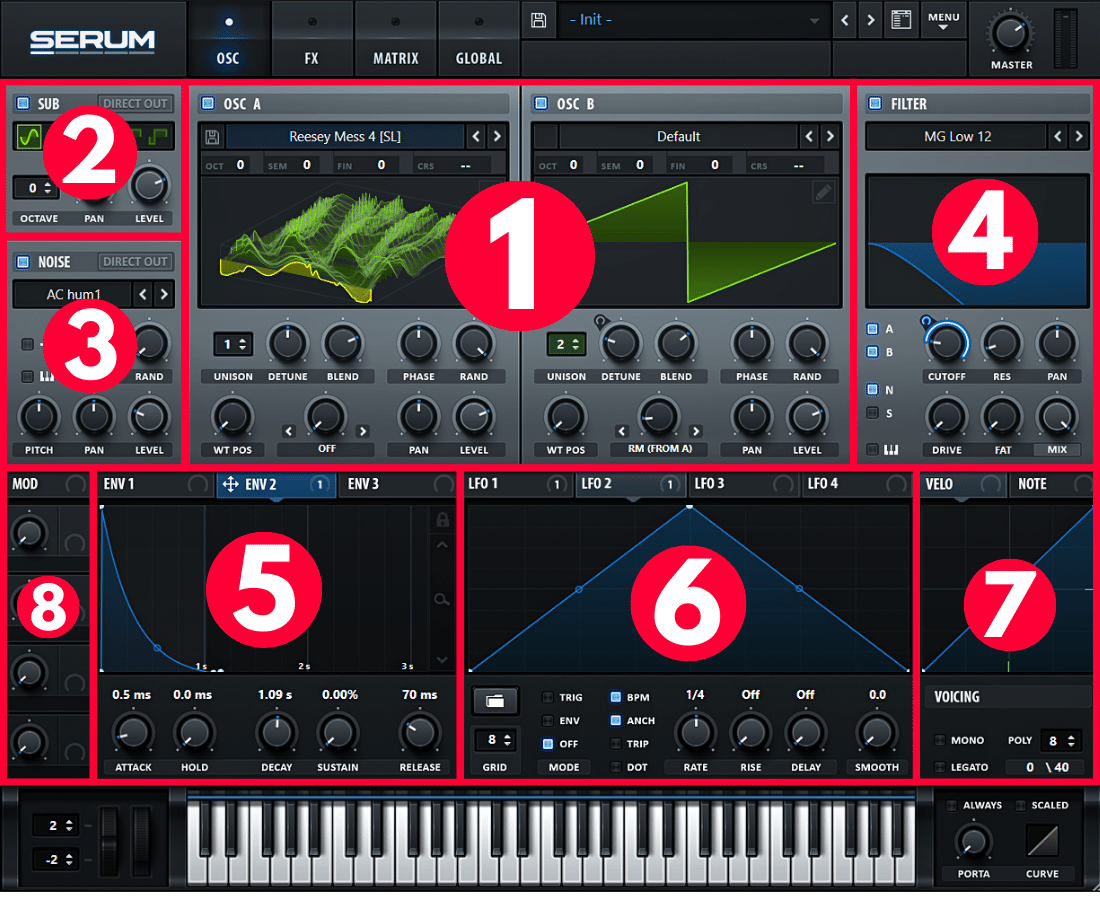
1. Oscillators
The most powerful part of serum is probably its iconic Wavetable oscillators. On most synthesizers, you can select a waveform like sine, triangle, saw, and square wave. You simply choose one or the other.
In Serum, you actually get 256 of these different waveshapes and the Wavetable Position smoothly scrolls through these various shapes. You can even create and edit your own waveshapes or import actual audio files.
Both oscillators A and B have exactly the same settings. A Unison of up to 16 voices with separate Detune and Blend controls. Unison makes copies of the oscillator and detunes each voice, which is perfect for thick super saw leads or warm string patches.
There’s a separate phase and random phase control. The random phase is turned on by default, so that’s something to be aware of. I recommend turning this off for bass or drum sounds, otherwise, it will sound slightly different on each key press.
There’s a level and pan control and on top of the wavetable view you can tune the oscillator in octaves, semitones, and cents. A separate coarse pitch control is easily accessible for modulation purposes.
Finally, the control labeled ‘off’ on the right of the WT Pos knob is a Warp control. This adds mathematic operations to the wavetable like FM, AM, ring modulation, sync, and much more. But I wouldn’t worry too much about this when you’re just starting out with Serum.
2. Sub oscillator
Right underneath the Serum logo is the sub-oscillator. Click on the square on the left of the word ‘sub’ to activate it. Here you can choose from a range of waveforms, and change the octave, pan, and level. There’s not much to it actually. It’s just a useful oscillator to thicken up your sound when 2 oscillators aren’t enough.
3. Noise Generator
Underneath the sub-oscillator is the noise generator. This is basically a sample player with different types of noise, but also hi-hats, kicks, or anything really. You can load your own samples in there if you’d like and many presets provide a collection of samples too.
In addition to pitch, pan, and level controls we also get a phase and random phase control. The button with the keyboard symbol activates key tracking, so the sample follows the pitch of your keyboard. And right above that is the one-shot toggle button. One shot means the sample is played only once. When this is turned off, the sample loops back to the start.
4. Filter
Then another significant sound contributor to any synth: the filter. Serum has one filter, but you’ve got a whole array of filters to choose from. In addition to the expected cutoff, and resonance controls Serum’s filter also features a pan control. This offsets the filter cutoff between the left- and right channels to widen the stereo field.
There’s a drive control to increase the input gain going into the filter and a Fat control. The fat control actually changes function depending on the currently selected filter type. Lastly, we get a Mix control to turn the filter into a shelving filter instead of completely attenuating everything above or below the cutoff frequency.
The keyboard control on the bottom left of the filter section enables key tracking. So when you turn up the resonance all the way, you can actually play the filter in tune with the other oscillators.
Above that are the filter source buttons. So you have the freedom to route oscillator A through the filter but bypass the filter on oscillator B, or the noise or sub generator.
5. Envelopes
Serum has three envelopes. Envelope 1 is always attached to the level, or the master output of the synth. Each input has an Attack, Hold, Decay, Sustain, and Release stage. The small blue doth in between each stage controls the curve from logarithmic to linear and exponential.
To assign the envelope to any parameter, just click and drag the envelope name to a control. Hold SHIFT + ALT and click on the modulation destination to switch between bipolar and unipolar modulation.

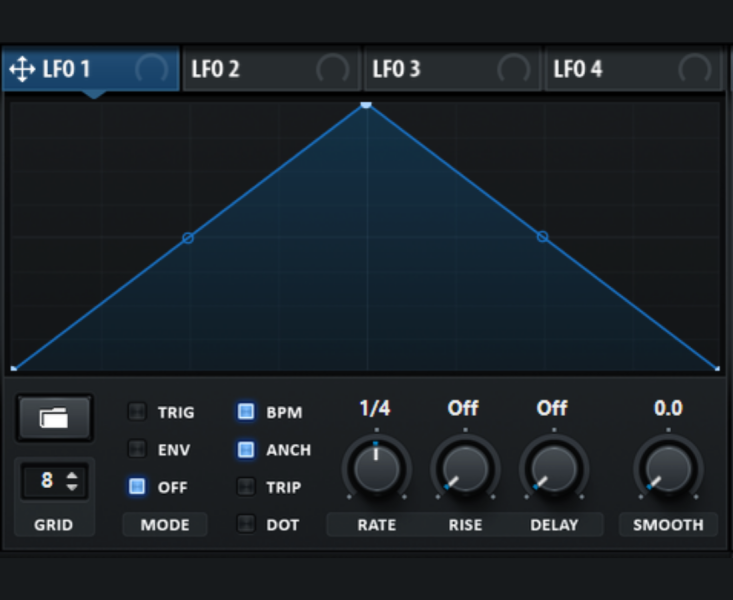
6. LFOs
Serum has 4 LFOs or Low Frequency Oscillators. They all have exactly the same functions. In the top left you’ll find a folder icon to load and save preset shapes. Right below that is the grid size.
Double-click to add or remove a point on the curve. Hold ALT and drag a point to snap to the grid. The LFO has 3 different triggering options.
Trig: The LFO restarts with each note. Also known as re-triggering.
Env: The LFO acts like an envelope, playing once on each keypress.
Off: The LFO neglects key presses and keeps on running.
Towards the right are 4 more buttons.
BPM: This syncs the LFO to your DAWs Tempo when turned on.
Anch(or): When turned on, the LFO will keep its relative phase when changing the rate control.
Trip(let): Adds triplets to the rate control.
Dot(ted): Adds dotted notes to the rate control.
Finally, the four encoders will control the following settings.
Rate: the speed of the LFO.
Rise: Adds a fade-in to the LFO, perfect for vibrato patches.
Delay: the LFO is delayed by a certain amount.
Smooth: smoothes out the LFO curve. There’s no visual indication on the blue curve.
7. Note Velocity
On the right-hand side of Serum are the Velocity and Note parameters. Velocity is how hard you press down on each key, and Note tracks the pitch of each note. Velocity is often sent to the filter cutoff so that the louder you play, the brighter the sound gets, just like on a real acoustic instrument.
Note can be used to the filter cutoff as well, to re-create key-tracking. This means, the higher you play on your keyboard, the more the filter opens up. This prevents higher-pitched notes, from getting lost by a static filter cutoff.
At the bottom of this section, you can see the number of active voices. So the Poly control sets the maximum number of voices. When you add an oscillator, Serum automatically doubles the amount of voices. The Mono button automatically turns the number of voices to 1 while the Legato button decides whether to re-trigger envelopes when more than one note is played.
Underneath this section is a Portamento or Glide control. The Always button, adds glide to every note, whether you play notes at once or consecutively. The Scaled option, lengthens the glide time when the distance between two notes increases. There’s also a curve control, if you want something other than a linear response.
8. Macros
On the left, right next to the envelope section, are the macro controls. These are 4 encoders that can be routed to multiple parameters. Useful to control multiple knobs at once. For example, you could connect Macro 1 to the filter cutoff, Envelope Decay, and Reverb Mix.
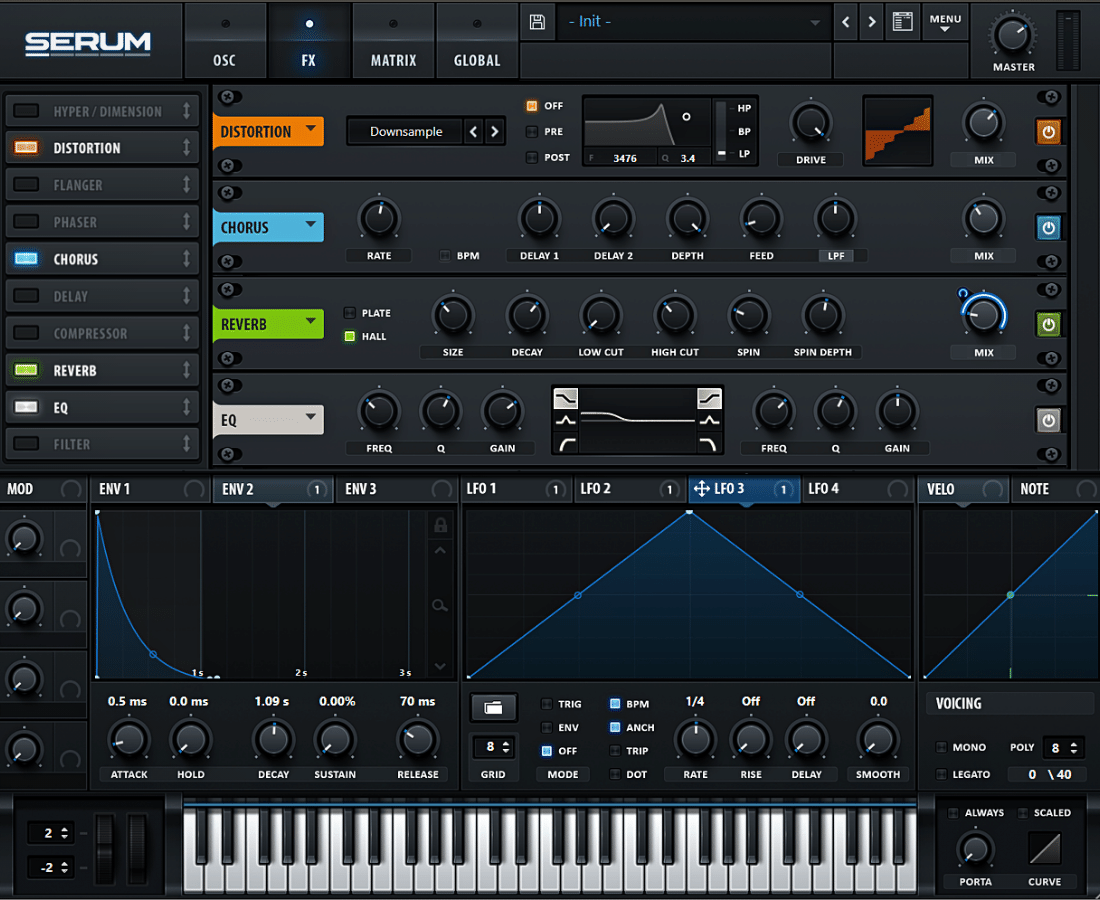
9. Effects
Serum has 10 built-in, high-quality effects that can be re-ordered by dragging the names on the left-hand side of the window. I’m not going to cover all of these effects right now, as you’ll find detailed descriptions on this Wiki, but there’s one effect that’s rather unique.
The Hyper / Dimension effect is one effect you won’t see that often. If you’ve used Native Instruments’ Massive before you’re probably familiar with the Dimension Expander effect. This is basically a Haas delay, where the size increases the delay time, and the mix is a dry/wet control.
The hyper part of this effect is basically another Unison effect, but it affects the entire signal path. There’s a maximum of 7 voices with a Rate, Detune, Retrigger, and Mix control.
10. Routing Matrix
You can route envelopes and LFOs to parameters by dragging and dropping. Another way to connect modulation signals is to use the routing matrix. In this window, you can select a source on the left, the modulation amount, and a destination.
You can also apply a modulation curve, and change the modulation between bipolar and unipolar. There’s even an option to add an Aux source, meaning you can control the modulation amount with another control, for example, the mod wheel.
You’ll also find sources and destinations you won’t otherwise find in the main window like aftertouch, or routing one LFO to control the rate of another LFO.

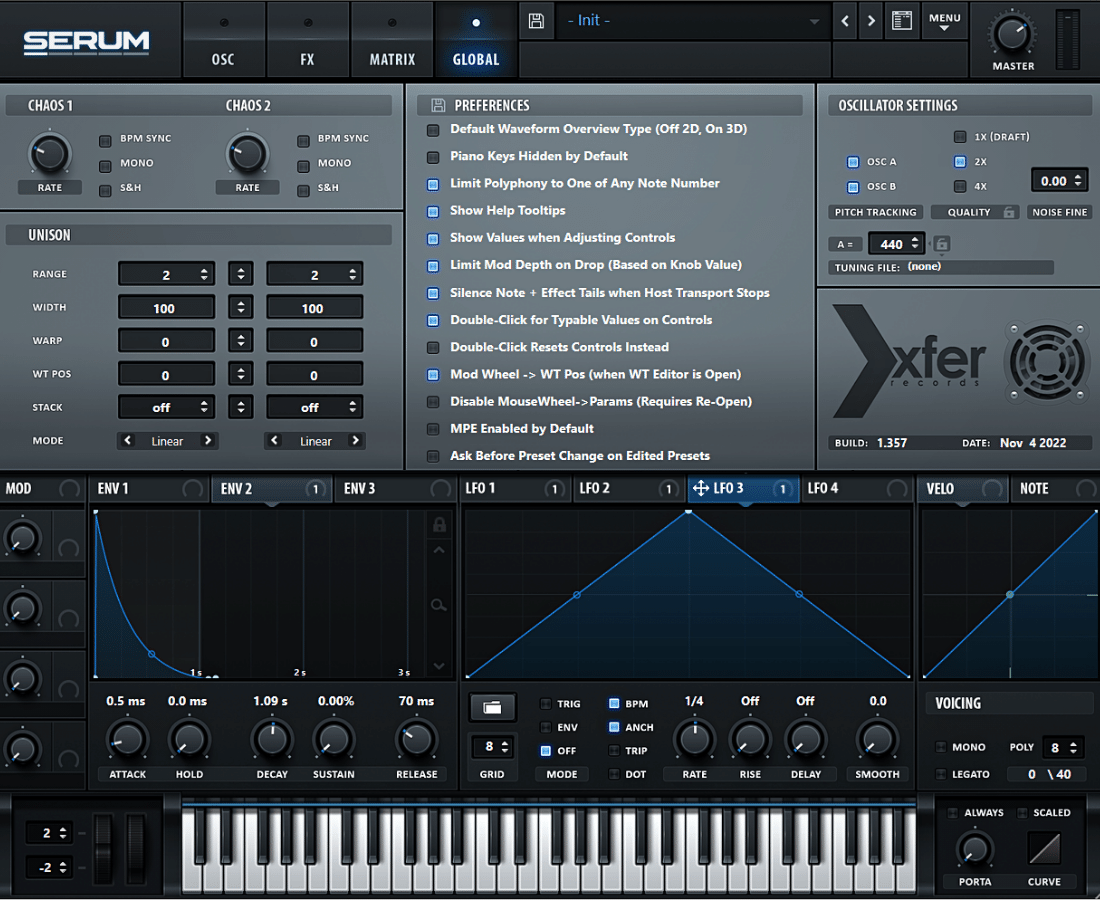
11. Global Setup
The final section is the Global settings menu. Here you’ll find a bunch of useful options. On the left, there are two chaos oscillators. You can use these as modulation sources in the routing matrix.
You can change the Unison settings for both oscillators:
Range: sets the maximum Unison detune range in semitones.
Width: the maximum stereo width.
Warp: with Warp enabled, this offsets the warp amount for each unison voice.
WT Pos(ition): a static wavetable position offset.
Stack: distributes the unison voices in various ways, including octaves.
Mode: 4 different unison detune algorithms.
In the middle, you’ll find some general preferences, useful to skim through. I like to enable ‘Double-Click Resets Control Instead’.
On the right, you can enable or disable pitch tracking for both oscillators. You can change the oversampling mode, this reduces artifacts when set to higher values. There’s also a noise fine tune control, a general tuning option and you can even load a custom tuning file.
Conclusion
You’ve made it! By now you should have a proper overview of Serum’s powerful features. The only thing I haven’t covered is the utility options menu, right next to the Master output control. But I think these are pretty self-explanatory.
Good luck playing around with Serum, and don’t forget to check this music production Wiki, as it’ll be updated regularly.