Ableton Delay
There are subtle audio effects and there are blatantly obvious audio effects. Delay is one of those obvious effects that adds repeats to a signal.
If you’ve ever clapped your hands above a deep well or canyon, you know the sound takes a while to bounce back to your ears. We’d say the sound is delayed.
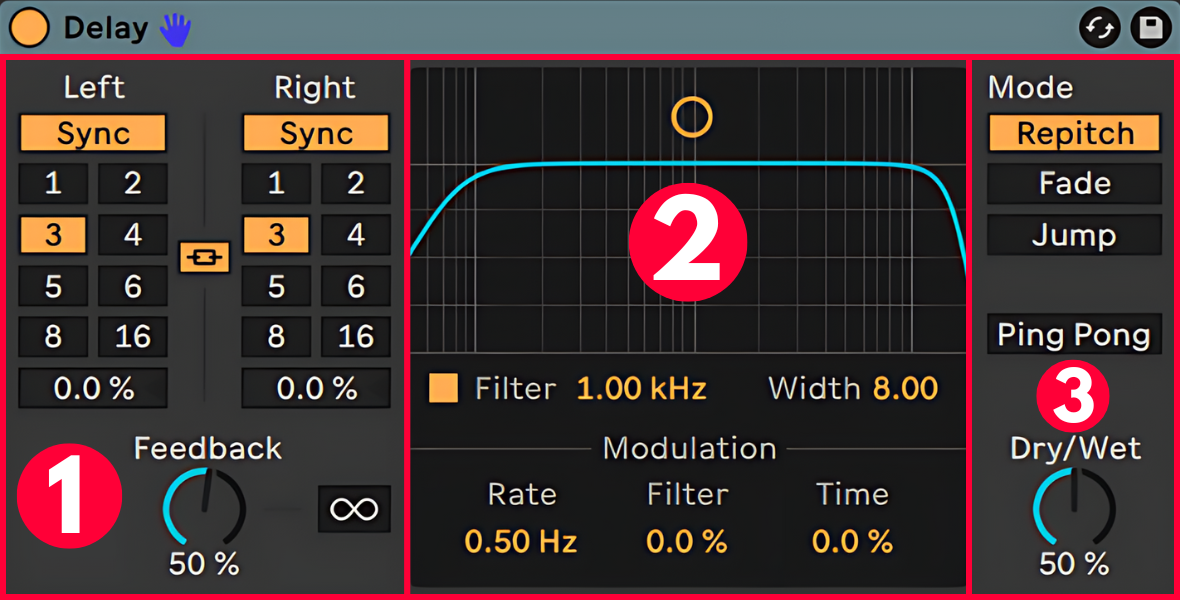
1. Delay Time and Feedback
That’s exactly what the delay effect does. You can adjust the time between each delay with the Delay Time control and the Feedback affects the number of repeats.
It’s called Feedback because the output of the delay is fed back to its input. Thus creating a feedback loop. Back in the day, studios used Tape recorders as a delay. Because it takes a finite amount of time for the tape to move from record to play head, this caused a delay. By changing the speed of the tape recorder one could change the timing of this delay.
In Ableton the delay time is synchronized to the project tempo. It’s a bit weird though as it’s indicated by numbers. In this case, the number ‘1’ represents 16th notes. ‘2’ is twice as long so 8th notes. On ‘3’ the delay time is three times as long resulting in dotted 8th notes, and 4 indicates quarter notes.
Instead of rhythmic values, you can set the delay time to milliseconds by clicking the yellow Sync button. This activates Time mode.
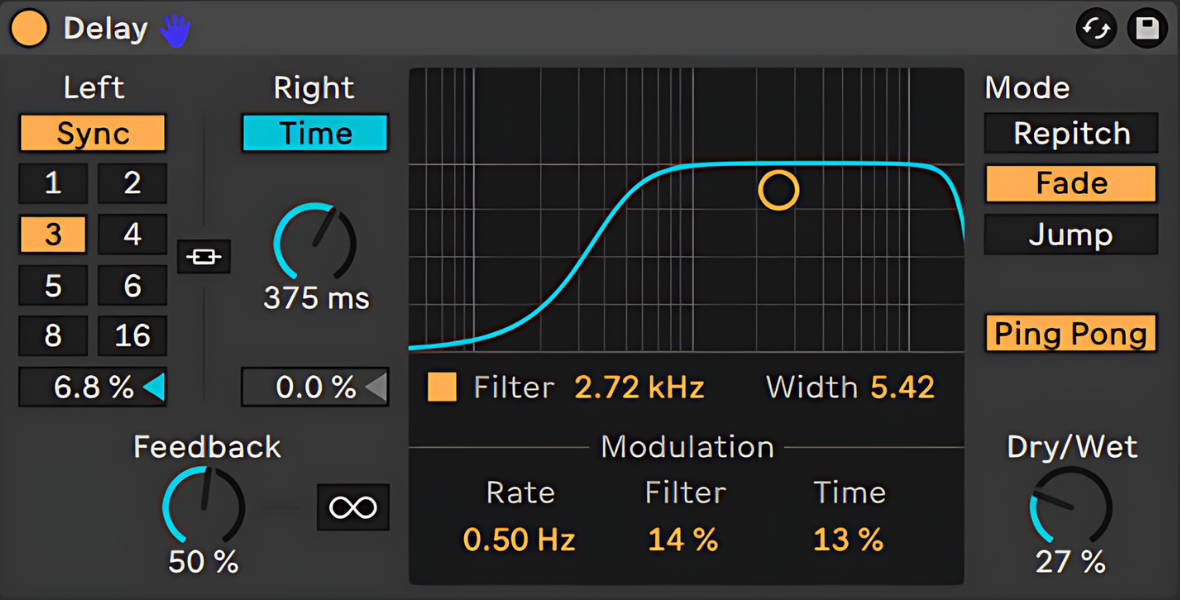
Notice that we have two delays, one for the left- and one for the right channel.
You can unlink the delays by clicking on the yellow ‘chain’ symbol in between.
In synced mode, there’s a delay offset at the bottom to create triplet notes or slight offsets between the left and right channels.
On the right of the feedback control, there’s also an infinity symbol. This Freezes the delay, making it repeat forever, or at least until this button is disabled again.
2. Filter and Modulation
In the middle of the screen, there’s a filter. You can drag the yellow dot to the left to remove high frequencies or towards the right to get rid of low frequencies. It’s a bandpass filter so dragging the dot up and down adjusts the bandwidth.
At the bottom, there’s a modulation section. A simple LFO with rate in Hz, modulating either the Filter’s Frequency or the Delay Time.
3. Delay Modes
On the right, you can select one out of three delay modes. These decide what happens when you change the delay time.
Repitch: the sound is pitched up or down, similar to a tape delay.
Fade: the sound is time stretched without pitch effect.
Jump: the delay time changes instantly.
The Ping Pong mode makes the sound jump from left- to right on each delay. This one’s useful to add extra width to any sound.
And finally, like on most effects, a dry/wet control to blend between the unaffected signal on the left and a fully effected signal on the right.
That’s it! Ableton’s delay effect is probably the most popular effect ever. That’s why it’s initiated on Return Track B by default.