Ableton Filter Delay
Let’s talk about Ableton’s Filter Delay. This audio effect is basically 3 regular Delays in one!
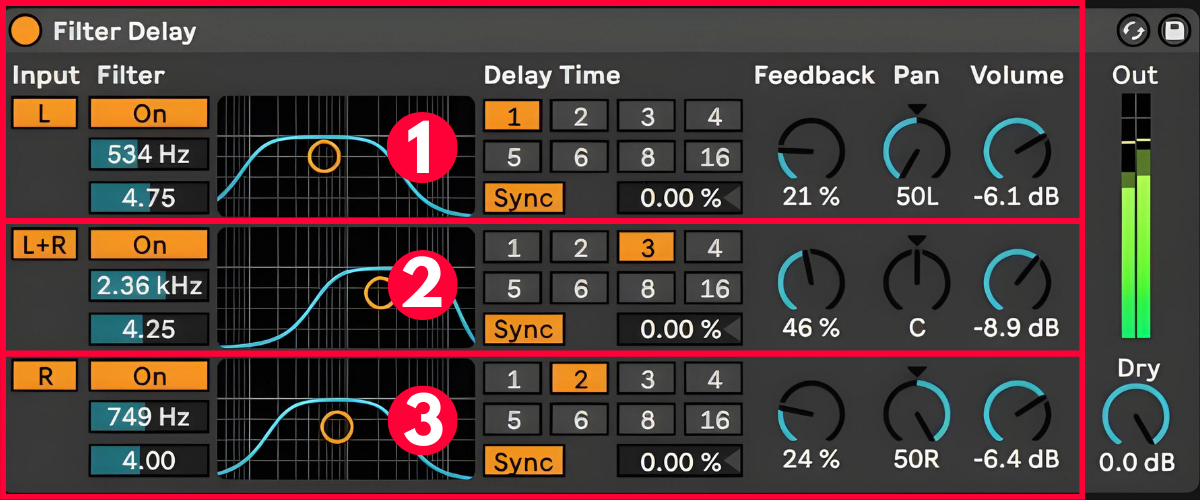
It lacks the LFO of the regular delay, but we get one delay for the left channel, one for the right channel, and one for the middle, or the left + right channel.
How does it work?
All three delays are identical with a bandpass filter, delay time, feedback, pan and volume control. Usually, there’s a dry/wet balance on a delay effect but this Filter Delay only has a Dry channel. The Wet part is controlled by the individual Volume controls.
I usually turn down the volume by at least 6dB and the center delay even more, and I keep the Dry at 0dB when I use it as an insert effect. I typically store this as the plugin’s default preset, which can be set in the right-click menu.
When Sync is turned on, the delay time is set in rhythmic values, or multiples of 16ths, where 1 is a 16th note, 2 is an 8th note, and 3 is a dotted 8th note. In sync mode, the value box shows a percentage. Here you can offset the delay time.
With Sync turned off, this number box allows you to set the delay time in milliseconds.
That’s it! Nothing special about it. But it’s a powerful plugin to add some stereo width to your drums, pads, or anything really. Play around with the panning and filters to create complex delay lines.